Showing posts with label linen. Show all posts

Thursday, September 15, 2016

Summer Wrap Up

I had meant to post pictures of garments on me before now, but between work (busy) and monsoon (afternoon storms), it's been difficult to set up a time. Oh yeah, and my remote gave out and I had to order another one from Amazon.

But I finally got around to it so here's an assortment of summer garments, right in time for the fall. It's still warm, so these will be wearable but I'm starting to lean more towards fall shades. So we'll see if they actually get any wear for a while, even as layering pieces.

If you want to see more details, click on the links.

Cutting Line Designs, Pure and Simple Shell:


Sewing Workshop, Eureka Top:


Butterick 6324, View A:


Cutting Line Designs, Simplify Your Life, View B:


Saturday, August 13, 2016

Cutting Line Designs, Pure and Simple Shell


This is one of those patterns that I often turn to when I need a simple top for warm weather (which is often here in Albuquerque). I currently have a couple of versions in rotation in my closet and I've made several others in past years.


This one came about when I was at my local JoAnn's picking up some thread for another project. Lately, thread has been a challenge. Although I have a whole drawer full, I never seem to have the color I need for a given garment (and recently, even ran out of white!). On my way to the thread, I noticed that the linen was on sale and a couple pieces of "tissue linen" (actually a linen and cotton blend) jumped into my cart. One of them was the bolt end of slightly less than 1 1/2 yards that became this top.

It was a pretty easy sew since I've made it several times before, so not much to say about construction except that Cutting Line's guide sheets are incredibly detailed, even for a simple top like this one. Unfortunately this pattern is out of print, but Louise Cutting has mentioned she may bring out something similar in the future.

I'll try to get a picture of this on me in the near future since the dress form really doesn't do it justice.

Sunday, November 29, 2015

TSW Cortona Shirt


This garment was inspired by Martha's lovely ikat Cortona that she posted on her blog. I bought the pattern (Siena and Cortona) when it first came out, but seeing it made up encouraged me to give it a try. I actually ended up making two of them. The first was a little snug for my taste but the second one is fine. It was easier to adjust the fit than I imagined, although making a large slash into the front pattern piece took a leap of faith!

The fabric is a cotton and linen blend that I located in my stash when looking for a suitable prototype fabric. In other words, something that had enough yardage, wouldn't require design matching, and wouldn't be a big loss if it didn't work out.  I have no idea how long I've had it or where it came from. The buttons also came from stash and matched perfectly. I think they were originally on a RTW sweater from many seasons ago.

The predominant feature of this shirt is a horizontal dart at the waist that starts near the center front on each side and continues to the back to form a slight peplum.


I eliminated the center back seam from the upper back because it wasn't really needed and eliminated the need to exactly match up the center back along two seams. I made the narrow button cuffs as they appear on the pattern. I would like to add "Lucille Ball" cuffs like Martha's on a future version for a little more flair.

Here are the pattern envelope and technical drawings to give you some more information regarding this design.


 I'm pleased with how it came out and will make this again, although it's a pretty distinctive design. It would be interesting to see how a stripe or print would look, or without sleeves as a summer top.

I hope to be able to model this for you in the near future so you can see how it looks on a person. Alas, today's photo shoot was indoors due to iffy weather and wind. I've already worn it to work and it went well with a Loes Hinse cardigan I made last winter

Sunday, September 27, 2015

TSW Hudson Pants


I've made several pairs of these because they're the perfect weekend pants for me. I've dressed them up or down and worn them with a variety of tops and shoes. They seem cooler than a full length pant, but that could also be a function of the cottons and linens I've used.

Below are an illustration and technical drawing of the Hudson Pant from The Sewing Workshop website. It appears they're currently not in stock on the site but can still be found in stores or on the internet.


I don't have too much to say about the sewing. They're pretty basic pull on pants with the addition of narrow darts at the lower hem. One thing I like about the draft is that the back leg is angled at the waistband, so the crotch depth is added at center back, not all the way across. This avoids some of the "clown butt" look (thanks, Debbie Cook for that description!). I modified the pattern for me but started with a size Small, then added 5/8" at each of the outer leg seams. In my opinion, the pant runs a bit large so check the flat pattern measurements against yourself to check the size you'll need.

This pair is made from a linen and rayon blend that I got at a local ASG fabric sale several years ago. I was a bit meh about the fabric but it has a nice hand, so I figured it could at least be used for a muslin.  However, I've come to like it as I've worked on the pants. I don't know if you'll see it again though. An entire ensemble would be too much of a good thing? Probably. The pants are more successful if a fabric with some drape is used vs. something stiff, even if you are using a heavy fabric.

It's important to mark the darts accurately and I've found that a Frixion pen is perfect for this.  Only a tiny spot of ink is needed at each dot. Once pressed, the ink disappears! I've washed the pants since making them and the ink did not come back.

The SewWest closet: the top is from Coldwater Creek (before their bankruptcy), the sandals are from Th!nk.


Monday, September 7, 2015

A Cutting Line Ensemble (Getting Back Up on the Horse)


After the sewing fail and the conference, this is what I've been working on. It's not perfect, but wearable. I took Louise Cutting's all-day workshop at ASG in 2009 and learned a lot of techniques, but there's a lot you forget. And my experience with Cutting Line Design patterns has been largely limited to the two shells (Pure and Simple and My Heart's a Flutter) that I've made over and over again. So I'm branching out, applying some techniques, and testing some new patterns.

For this outfit, I used the camp shirt from Easy, Ageless, Cool. The upper part (neckline, shoulders, armscye) is based on a Small and the rest is a Medium. Comfortably loose, but I think I'll shorten the sleeves a touch next time, as I did for the bodice. This pattern also has instructions to add front and back darts for a closer fit, but I chose the undarted version this time because of the thickness of the fabric and the embroidery. I also left off the pocket this time, which would be totally decorative anyway.


The skirt is from In the Trenches. I traced it much, much shorter than originally drafted. I'll be tracing off a longer version later on. I used a Medium to start with. The pattern includes instructions to refine the fit to your own measurements, so it's narrower than a true Medium as drafted.


The fabric is an embroidered rayon and linen from my stash. I ironed both garments before putting on and photographing the outfit, believe it or not. Hopefully it will become more pleasantly rumpled instead of creased over time. The detail pictures below show the embroidery better. The picture above is probably closest to the true shade.

One of the things that takes some getting used to with Cutting Line Designs is the amount of detail the instructions contain. Each of the patterns I've examined have had at least 6 pages of instructions. The temptation is to skip over them (like we all do on the Big 4), but I found it helpful to actually follow them step by step and not assume...some of her techniques are different than what we're all used to but they work.

Here are some more details of the garments.  The pattern piece for the collar is one piece; that is, you only cut one layer which incorporates both upper and under collar. The front edges are on the fold. One of the things that I did this time that I will do differently is to use a thinner interfacing. I just used some fusible tricot I had on hand and it was a little too heavy--that's what happens sometimes when inspiration strikes and you can't wait!


The collar features a center back seam on the underside. Once the center back seam is sewn, the collar starts to look like what we're all used to. Louise uses the one piece collar on all of her patterns that have collars because bulk is reduced. She credits Judy Barlup for this technique, and I believe there is also an old Threads article showing how to adapt conventional collar patterns to this.

The shot below also features Louise's deep back facing. She claims it helps to balance the garment. I'm not sure about this (yet), but I have seen a lot of RTW with back facings that use this deeper style.


The shot below shows the Louise Cutting elastic waist and pocket. Keep in mind that the skirt is not as gathered on me as it is on the form. My form is a little thinner than I am. :( I had my doubts about this waistband, but it is quite comfortable. It uses a soft and stretchy 1 1/2" wide elastic that Louise has sourced.

The pocket is cut on with the back of the skirt, brought forward, and then topstitched in place. Again, the purpose is to avoid the excess bulk of additional pocket seams and two pocket bags. I don't know if I'd use this style of pocket every time, but it is an interesting solution to side seam pockets.


The back vent wasn't strictly needed for this short of a skirt, but I did like it because the edges are nicely mitered.


The SewWest Closet: Nine West Sandals, Foster Grant sunglasses from Walgreen's (I forgot to take them off because I wear sunglasses all the time outside--the sun is relentless!).

Thursday, July 9, 2015

2015 First Day of School Project

I wasn't sure if I'd have time to participate this year, but decided to go for it during the long Independence Day weekend. I used a different pattern this time, a circa 1998 McCall's pattern that I got from the ASG Trading Post several months ago. I made the little dress featured in the photograph:


As with previous clothes I've made for First Day of School, I mostly used remnants from clothes I've made for myself. This one is made from some cotton sateen I used for a skirt. It's a little shorter than the other two due to fabric limitations, but I'm sure it will work well for some little girl.


The facing on this one is from the Vogue 8645 dress I recently posted, and the green is a faux linen that I used last year to make little girl's pants for First Day of School. The green is more olive than in the picture.


This one is made from a heavyweight rayon that I previously used for this dress:


The construction was pretty straightforward, all machine stitching and serging. I definitely will hang onto this pattern because the dresses were so easy and fast to make! I hope the girls that get these dresses will enjoy them.

Tuesday, June 30, 2015

Vogue 8645 Dress


I've been on a bit of a linen binge lately, and this dress is another example. I got this fabric last year at JoAnn's, not my favorite fabric store (is it for anyone?). But I have to admit that even they have nice fabrics now and then. It's a linen and rayon blend, based on how it feels and drapes. One of the reasons I chose this fabric was because the design went all the way across the width, so I didn't need to worry about the placement of the pattern  pieces (no bullseyes or twinning).


I've been meaning to make up this pattern for a few summers but something has always gotten in the way until now. The pattern is out of print but is currently still on the Vogue website.


One of the major changes I made in sewing this dress was to eliminate the lining. I just serge finished the edges, turned them under, and topstitched. The linen is heavy enough that there's no show through.

This was an easy sew and I think the pattern's a keeper.

Patent leather slingback platform sandals by Vigotti and my standard silver hoop earrings.

Sunday, June 28, 2015

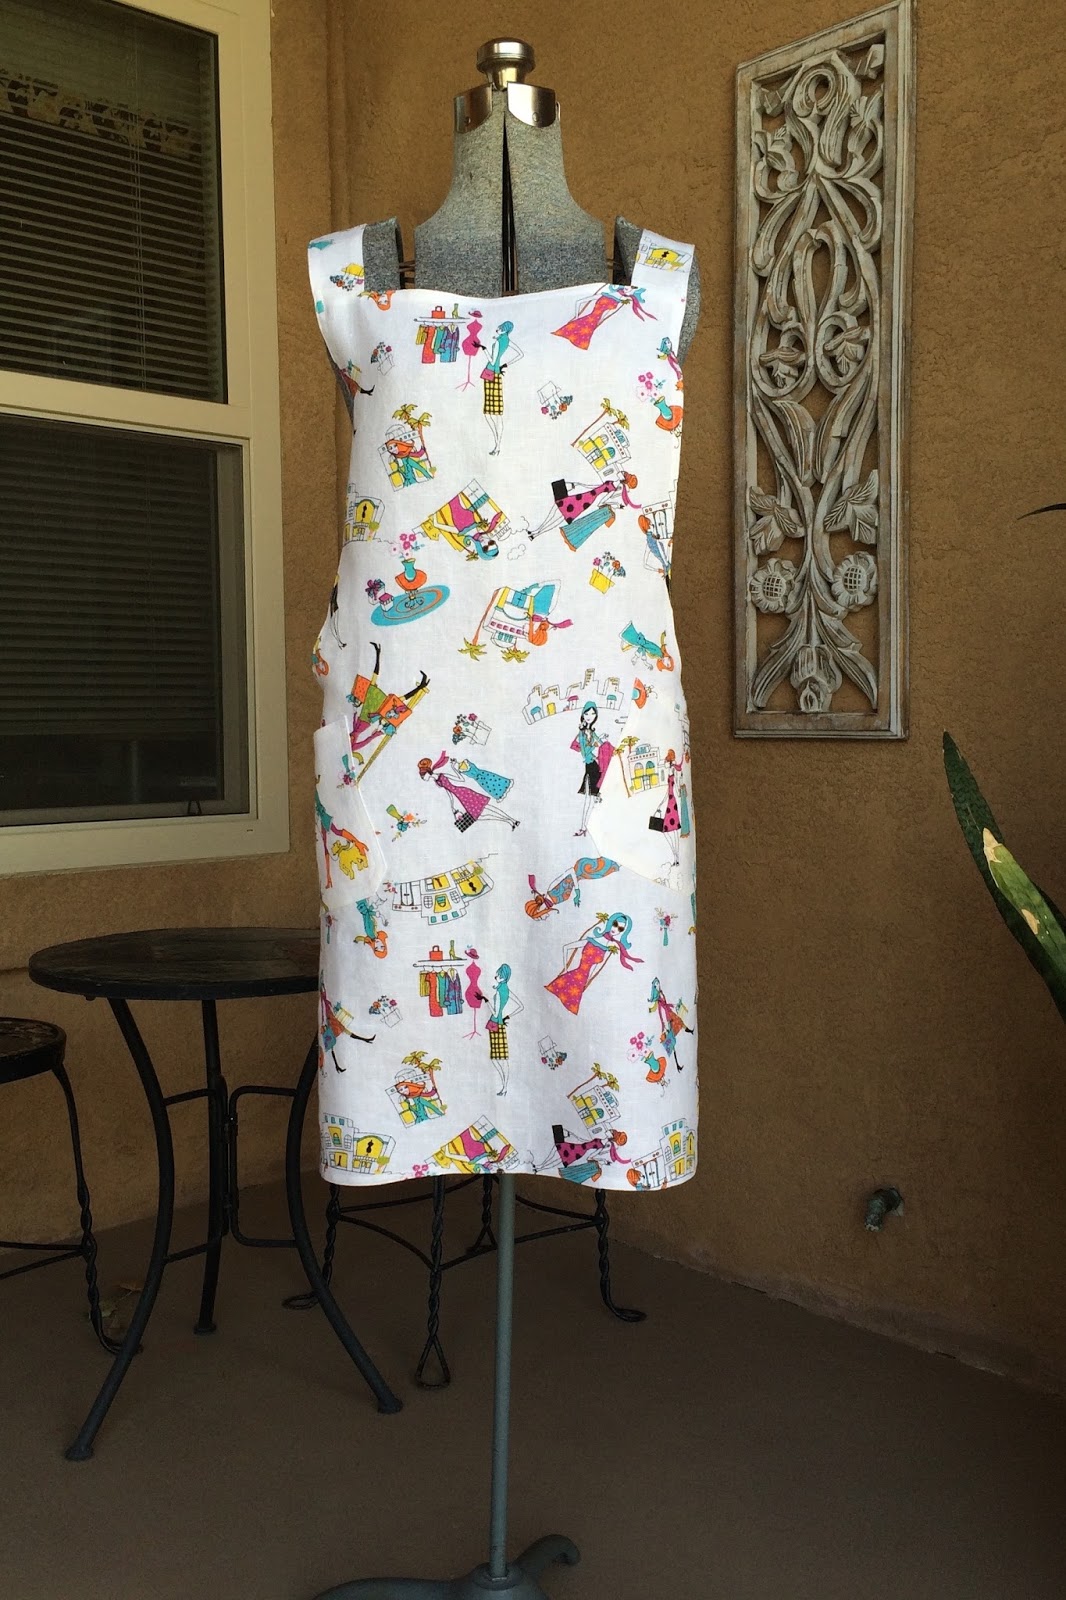
Linen Apron


I finished this project last month but I've been holding it back because it was a gift. It's been mailed and the recipient has confirmed she received its, so it's time for the reveal.

I got this fabric last year while visiting Nob Hill Fabrics with Shams.


I had to get it because the print featured some orange haired fashionistas, which reminded me of my red-headed sister. I only bought a yard because my original thought was a bag, then I changed my mind and I've been looking for another project ever since. Because, perfect fabric! Here's a closer view of it on the right:


I saw the apron on Facebook, courtesy of the blog of fabrics-store.com. Full disclosure, I have not bought any actual fabric from them yet but plan to once I've worked the stash down a bit.

Anyway, an apron was a great choice because my sister loves to cook, and the pattern called for the right amount of fabric. It's really easy to wear too, no ties or fasteners to deal with. Just throw it on and you're all set. Here's a link to the tutorial. The hardest part for me was drawing out the pattern. I adapted it slightly, making the straps into a separate piece pattern piece to save on fabric. Also, I hemmed the edges instead of just serging them as the pattern suggests. Even so, it took minimal time to make and would be a great gift for any cooks in your life.


Sunday, June 21, 2015

Butterick 5218 On the Hoof


Ok, so it's been a while since I posted and I edited the post on this tunic without realizing I actually posted already (2 months ago). So here's a picture of it on me--the sun is out and I'm spending a quiet afternoon at home. No more excuses. For all the details, please refer to this post.

Sunday, April 26, 2015

Butterick 5218 Tunic View B


Back to the blog! The weather and my schedule have been cooperating at last! I finished this up in time for the Portland trip in early May but couldn't schedule a photo of me wearing it.  Finally I do!

It's par for the course on this project, which felt like I was working on it forever! I originally cut it out last fall in Material Girls but didn't get around to sewing it before the weather changed.Even though it's long sleeved, it's made of a light weight linen (from Jo-Ann's) that wouldn't have been wearable in cooler weather.  So I started working on it again this spring in bits and pieces.

This is another OOP pattern from the stash, although I noticed it's still available on the Butterick patterns web site. They do have a new one on the site that's somewhat similar in front (Butterick 6099), but the back has a yoke and pleat instead of gathers at the back neck.

I pretty much made it from the pattern, although the illustration is slightly wrong. View B actually uses the same collar as View A instead of the notched collar shown in Views C and D, but that's was fine with me. What wasn't so fine was those voluminous gathered sleeves, so I shortened and tapered them. I took about 6" off the width and about 2" off the length, and they're still full length sleeves. I also shortened the tunic by 4", so unless you're tall, you might end up with a dress instead of a tunic. I used the extra length to add a real hem instead of the narrow one directed by the guide sheet.

I do like the result though, in spite of those things and a few other wonky aspects of the guide sheet. I don't know that I'll make another though.

Collar detail:


Placket detail (aren't those buttons great? Like jewelry):


Back neck detail, with gathers:


And at last, a photo of the tunic on me! In addition to the tunic, I'm wearing a RTW pair of ponte leggings, and some Born sandals. And the silver hoops I wear most of the time. My hair's up so you can see garment details.


Monday, September 1, 2014

Revisiting the Eureka Top by TSW

I'm still not ready to let this pattern go so I made another out of the woven crinkle rayon that I used for the Asymmetrical Skirt. The crinkles approximate the stretch of a knit, and I still have a lot of it left over.


This time, I made a couple of changes. I left off the sleeve bands and simply turned up a narrow hem instead. I also made a slight "mullet" hem, with the back longer than the front, and turned up a narrow hem there as well.


The result is a very loose fitting, swingy top that I like better than the original.  It also makes a nice ensemble when combined with the skirt. Thanks for the suggestion,  Janine! Here are a few shots of that:


Also, I couldn't resist a Shams-style twirly shot so you can see the skirt in motion:


Yes, Summer is officially over, but it's still warm and it's fiesta time, so I'll still get some wear out of this before the weather gets too cool.

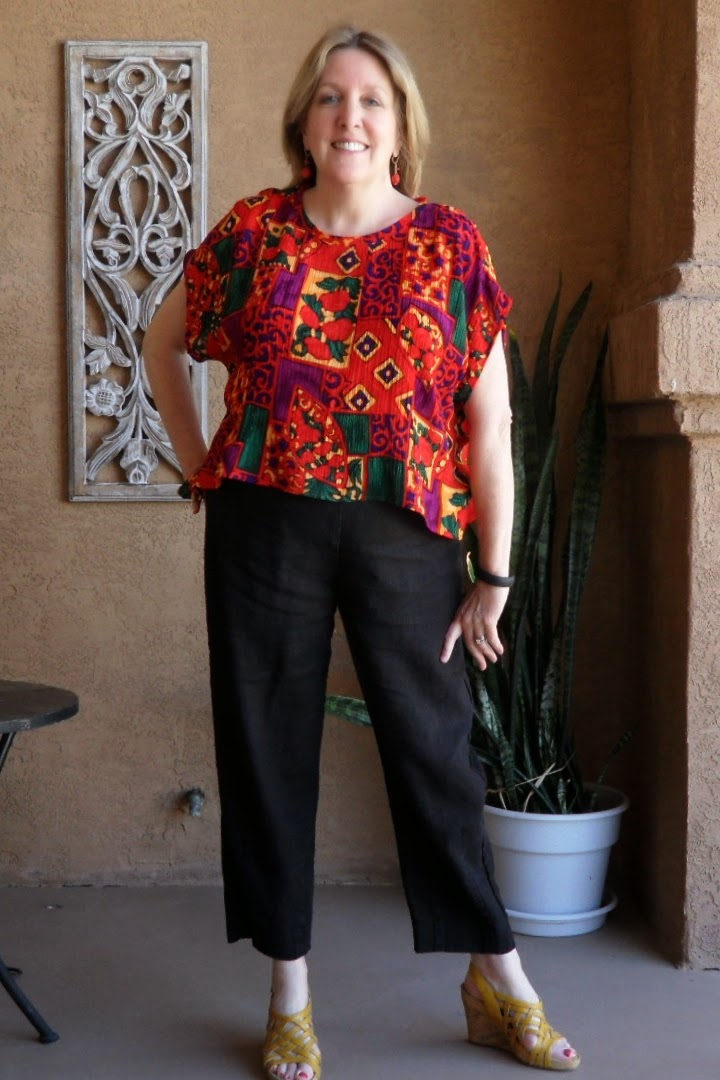
PS-the black pants are the Hudson Pant by The Sewing Workshop (aka TSW) made from linen I bought from Gorgeous Fabrics last year.

Sunday, June 29, 2014

2014 First Day of School Project, Part 2

I'm well underway with the making of the matching capris for the peasant tops I showed you in the last post. So far, I've completed a blue linen blend pair. This fabric is from stash and came from TSW.


 and two gray cotton pairs. I bought this fabric from JoAnn's last year for boys' pants but the gray looks perfect with the fuchsia, yellow, and gray print tops.  Since they're both the same, I'm just showing one:


They are View E of the same pattern I used for the tops (Butterick 5776). I stopped by JoAnn's on Friday and got a green linen look fabric to match the two remaining tops. The final two pairs are all cut out and ready to be sewn.

A good thing too, this project comes to a close on July the 10th when the outfits have to be turned in. It does not appear there will be any little boys' outfits this year but that will be my priority for next year, assuming that we'll be doing this project again.

This weekend, my sister in law Dorothy came to visit from New Jersey for a little getaway.


Instead of doing a lot of touristy things, we mostly stayed around the house, logging a lot of time on the back patio.  We did go out for a couple of nice dinners and a lunch, since she has become addicted to chile.  She and I also went shopping on Friday at ABQ Uptown--Coldwater Creek, the Loft, Lululemon,  Ann Taylor and Alfred Angelo. I'm not much of a RTW shopper but did find a few items. Of course, Coldwater Creek is liquidating and the pickings are really getting slim, but I did find a couple of t-shirts that are wearable for work and some baubles.


(Note to self: find something to clean the permanent marker stains off the cutting mat.)

I also found a cute t-shirt at the Loft, which was a total surprise. It's eyelet on the front and sleeves, and the back is knit. Sorry for the odd angle but this was the best of the lot for showing the eyelet.


It's wearable as is, but I may make a couple of minor tweaks to improve the fit. The darts are too high for me and of course, that bugs me as a sewist. So I'll be adjusting them.

Lululemon is a new store for Albuquerque. However I'm dubious that $100+ yoga pants will go over with the local citizenry. Or maybe they'll be wildly successful, who's to say?

We stopped into Alfred Angelo, because Dorothy is MOB for an upcoming wedding and is trying to get some ideas for a dress. She doesn't sew and will be buying a gown.  I do sew and will be needing  dresses for the wedding and rehearsal dinner. October will be here fast, so I'll have some work ahead of me.