Yes, more of them. But a basic T shirt is pretty versatile and they make great layering pieces. I finished this group up yesterday after a marathon session of coverstitching.
This time, I was able to get some picture of me wearing them, with various levels of success. But then, I never claimed to be a professional model or photographer!
This one was made from a remnant I had left over from another T I made several years ago when I first got the pattern. The original is long gone, but I had just enough for another version. The fabric came from Emma One Sock and is a cotton and lycra blend.
The fabric for this one came from Gorgeous Fabrics and is a very soft rayon. I think this one may end up as a layering piece. Although rayon is nice to work with and very comfortable to wear, it tends to be clingy.
Another fabric from Gorgeous Fabrics. This one is a poly matte jersey. The color in real life is darker, what I'd refer to as an American Beauty Rose shade.
This fabric is from Jo-Ann's. It's a bit thin, so will be another layering piece, but I really loved the print.
I think I've located a current Kwik Sew pattern that's pretty similar to my TNT 2565. I haven't sewn it yet but it may be worth trying.
Showing posts with label JoAnn's. Show all posts
Monday, September 12, 2016
Saturday, August 13, 2016
Cutting Line Designs, Pure and Simple Shell
This is one of those patterns that I often turn to when I need a simple top for warm weather (which is often here in Albuquerque). I currently have a couple of versions in rotation in my closet and I've made several others in past years.
This one came about when I was at my local JoAnn's picking up some thread for another project. Lately, thread has been a challenge. Although I have a whole drawer full, I never seem to have the color I need for a given garment (and recently, even ran out of white!). On my way to the thread, I noticed that the linen was on sale and a couple pieces of "tissue linen" (actually a linen and cotton blend) jumped into my cart. One of them was the bolt end of slightly less than 1 1/2 yards that became this top.
It was a pretty easy sew since I've made it several times before, so not much to say about construction except that Cutting Line's guide sheets are incredibly detailed, even for a simple top like this one. Unfortunately this pattern is out of print, but Louise Cutting has mentioned she may bring out something similar in the future.
I'll try to get a picture of this on me in the near future since the dress form really doesn't do it justice.
Saturday, August 6, 2016
Butterick 6324 View A Top
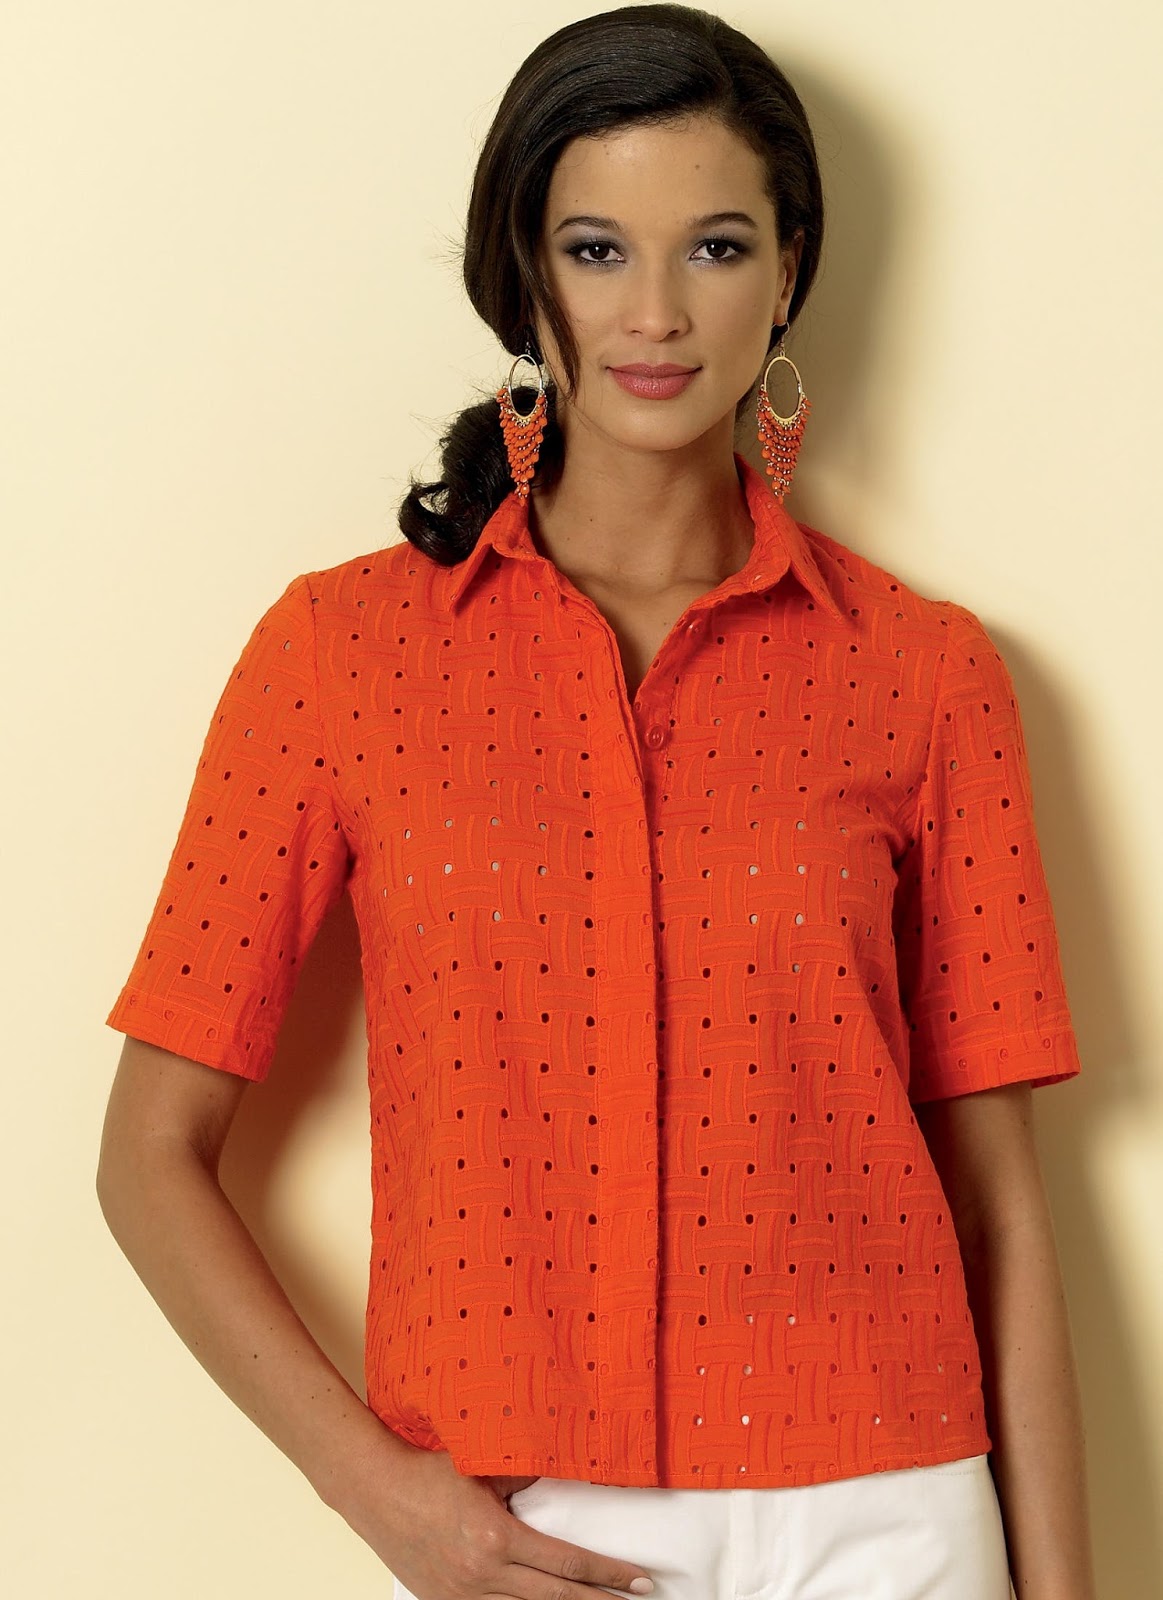
I bought this pattern because I was intrigued by the photo of the orange eyelet top on the envelope.
I'd also been looking for a shirt style without facings that I could use with sheers and eyelets. And that hidden button placket was so cool!
I traced off the View A pieces since the pattern tissue combined multiple views as single pieces on the tissue (grrrr...). And then it sat.
Why? Because the hidden button placket consisted of several separate pieces seamed together. Holy bulk, Batman! So, I re-drew the placket and band so they would be part of each of the pattern fronts. A bit of a brain teaser but I eventually worked it out. Less bulk, many fewer seams, and much easier to match patterns across the front of the garment. Below is a photo showing off the placket and collar:
You can see that the fabric is "ventilated", with the stripes woven with openwork. The pattern also features a collar with stand, which went together nicely.
Another change I made to add to the pattern was to provide some additional room in the hip area. Although the envelope went up to a 14, I needed a bit more room. :( I used one of Louise Cutting's "Industry Insider Techniques" videos to add another 4 inches. The technique I used is in Volume 6. The DVDs are produced by Threads Magazine and have been very helpful to me. In my experience, many sewing techniques are easier to view than read.
You can see that the fabric is "ventilated", with the stripes woven with openwork. The pattern also features a collar with stand, which went together nicely.
Another change I made to add to the pattern was to provide some additional room in the hip area. Although the envelope went up to a 14, I needed a bit more room. :( I used one of Louise Cutting's "Industry Insider Techniques" videos to add another 4 inches. The technique I used is in Volume 6. The DVDs are produced by Threads Magazine and have been very helpful to me. In my experience, many sewing techniques are easier to view than read.
The fabric is a novelty weave cotton print from JoAnn's, of all places! I was very pleased with how it handled during construction. Every one in a while, even they get it right. Of course they don't have anything like it in their stores now, but maybe they could bring it back...perhaps in some solid colors?
Overall, I liked how my test garment came out and I'll be wearing it a lot and making more like this. I'm also planning to tackle a couple of the other views too. View B has a contrast hidden placket that could be fun to play with. View C features lace overlays and back, which would work well with some sheer remnants I've acquired. View D's illustration looks very blah, but could become a nice basic without overlays, or more special with them.
Sunday, July 31, 2016
Another TSW Liberty Shirt
I've made this shirt several times and have been meaning to give it a rest, but work has intervened. We've been having "Red on Fridays" in honor of a coworker who's currently on assignment with the NM National Guard overseas, so I've been supplementing my work wardrobe with red garments.
I bought the red ikat cotton from Ann Silva's several years ago. She mostly sells quilting fabrics, but once in a while she gets other things like this! It was a joy to work with although the color was a bit tricky, since it's a cross weave. I auditioned several colors of thread and ended up using a Coats thread called "Tomato Bisque." The buttons were another surprise. I tried several different red buttons but these odd pink-ish ones looked the best with the fabric. I guess it goes to show that you have to look at the blend instead of individual threads when determining what will work best.
Once again, I used the collar I drafted instead of the one that came with the pattern. Just my preference. As with the other versions I've made, this one went together easily.
I really like the Sewing Workshop pattern line. I like most of the releases and they have excellent instructions.
Once again, I used the collar I drafted instead of the one that came with the pattern. Just my preference. As with the other versions I've made, this one went together easily.
I really like the Sewing Workshop pattern line. I like most of the releases and they have excellent instructions.
Wednesday, September 30, 2015
Butterick 6176 Kimono
This is a kimono I recently made from a stashed poly chiffon from Joann's. I've been seeing them around lately and thought it would be a nice addition for my wardrobe. This one is a prototype to see how the pattern would work.
I made view C, which is around knee length. As you can see from the technical drawing, there were several variations of length, trimmings, and a choice of straight or curved hem.
There isn't really much to say about the construction itself, since the pieces are basically rectangles. The challenge was hemming the edges all around the circumference of the garment as well as sleeves. Because the fabric was ravelly, I serged around all the circumference, then basted in the 5/8" seam allowance before pressing in the double folded hem (including mitered corners on both fronts). Once all that was done, it was fairly simple to machine hem the entire thing. Sleeve hemming was basically the same process.
I wore the kimono to church on Sunday and was basically happy with it, although I think there's a better way to handle the finish of the garment. I'd prefer to have a more "authentic" kimono treatment (a band) around the front openings, but that should be fairly simple to figure out. I have a couple more fabrics that I'd like to make into kimono jackets since they're nice little coverups for an otherwise plain outfit.
Another view of mine. You can see a little bit better that the fabric is sheer:
Thursday, July 9, 2015
2015 First Day of School Project
I wasn't sure if I'd have time to participate this year, but decided to go for it during the long Independence Day weekend. I used a different pattern this time, a circa 1998 McCall's pattern that I got from the ASG Trading Post several months ago. I made the little dress featured in the photograph:
As with previous clothes I've made for First Day of School, I mostly used remnants from clothes I've made for myself. This one is made from some cotton sateen I used for a skirt. It's a little shorter than the other two due to fabric limitations, but I'm sure it will work well for some little girl.
The facing on this one is from the Vogue 8645 dress I recently posted, and the green is a faux linen that I used last year to make little girl's pants for First Day of School. The green is more olive than in the picture.
This one is made from a heavyweight rayon that I previously used for this dress:
The construction was pretty straightforward, all machine stitching and serging. I definitely will hang onto this pattern because the dresses were so easy and fast to make! I hope the girls that get these dresses will enjoy them.
As with previous clothes I've made for First Day of School, I mostly used remnants from clothes I've made for myself. This one is made from some cotton sateen I used for a skirt. It's a little shorter than the other two due to fabric limitations, but I'm sure it will work well for some little girl.
The facing on this one is from the Vogue 8645 dress I recently posted, and the green is a faux linen that I used last year to make little girl's pants for First Day of School. The green is more olive than in the picture.
This one is made from a heavyweight rayon that I previously used for this dress:
The construction was pretty straightforward, all machine stitching and serging. I definitely will hang onto this pattern because the dresses were so easy and fast to make! I hope the girls that get these dresses will enjoy them.
Tuesday, June 30, 2015
Vogue 8645 Dress
I've been on a bit of a linen binge lately, and this dress is another example. I got this fabric last year at JoAnn's, not my favorite fabric store (is it for anyone?). But I have to admit that even they have nice fabrics now and then. It's a linen and rayon blend, based on how it feels and drapes. One of the reasons I chose this fabric was because the design went all the way across the width, so I didn't need to worry about the placement of the pattern pieces (no bullseyes or twinning).
I've been meaning to make up this pattern for a few summers but something has always gotten in the way until now. The pattern is out of print but is currently still on the Vogue website.
One of the major changes I made in sewing this dress was to eliminate the lining. I just serge finished the edges, turned them under, and topstitched. The linen is heavy enough that there's no show through.
This was an easy sew and I think the pattern's a keeper.
Patent leather slingback platform sandals by Vigotti and my standard silver hoop earrings.
Sunday, June 21, 2015
Butterick 5218 On the Hoof
Ok, so it's been a while since I posted and I edited the post on this tunic without realizing I actually posted already (2 months ago). So here's a picture of it on me--the sun is out and I'm spending a quiet afternoon at home. No more excuses. For all the details, please refer to this post.
Sunday, April 26, 2015
Butterick 5218 Tunic View B
Back to the blog! The weather and my schedule have been cooperating at last! I finished this up in time for the Portland trip in early May but couldn't schedule a photo of me wearing it. Finally I do!
It's par for the course on this project, which felt like I was working on it forever! I originally cut it out last fall in Material Girls but didn't get around to sewing it before the weather changed.Even though it's long sleeved, it's made of a light weight linen (from Jo-Ann's) that wouldn't have been wearable in cooler weather. So I started working on it again this spring in bits and pieces.
This is another OOP pattern from the stash, although I noticed it's still available on the Butterick patterns web site. They do have a new one on the site that's somewhat similar in front (Butterick 6099), but the back has a yoke and pleat instead of gathers at the back neck.
I pretty much made it from the pattern, although the illustration is slightly wrong. View B actually uses the same collar as View A instead of the notched collar shown in Views C and D, but that's was fine with me. What wasn't so fine was those voluminous gathered sleeves, so I shortened and tapered them. I took about 6" off the width and about 2" off the length, and they're still full length sleeves. I also shortened the tunic by 4", so unless you're tall, you might end up with a dress instead of a tunic. I used the extra length to add a real hem instead of the narrow one directed by the guide sheet.
I do like the result though, in spite of those things and a few other wonky aspects of the guide sheet. I don't know that I'll make another though.
Collar detail:
Placket detail (aren't those buttons great? Like jewelry):
Back neck detail, with gathers:
And at last, a photo of the tunic on me! In addition to the tunic, I'm wearing a RTW pair of ponte leggings, and some Born sandals. And the silver hoops I wear most of the time. My hair's up so you can see garment details.
Labels:
Butterick,
JoAnn's,
linen,
OOP,
The SewWest Closet
Saturday, February 21, 2015
Second Loes Hinse Sweater Set
I was almost able to finish another Loes Hinse Sweater Set before the trip, but didn't quite get it done.
This one is made from a Missoni-ish knit fabric that I've had in the stash for a long while. There are are two yarns, a chenille and a thin rayon. It came from JoAnn's, back when they had quite a bit of good "jobber" fabrics. I still have some green and some black left in this fabric.
Since I'm lounging about with no makeup and pajamas, I'm showing it on Ms. Acme this time.
My serger did not like this fabric at all, so I used a conventional machine throughout, a narrow zig zag for construction, then a wider zig zag for finishing. The new machine did a great job making all the buttonholes.
Coco recently asked about my dress form. It's an Acme adjustable form that a friend gave to me when she moved to Oregon several years ago. Based on the label (which fell off and is lost), I think it's probably from the 1950's-early 1960's. It has metal bars on inside to allow for adjustment. It a bit smaller than I am, so I use it for display vs. fitting. It comes in handy during construction as a tool for working out how the garment should look.
This one is made from a Missoni-ish knit fabric that I've had in the stash for a long while. There are are two yarns, a chenille and a thin rayon. It came from JoAnn's, back when they had quite a bit of good "jobber" fabrics. I still have some green and some black left in this fabric.
Since I'm lounging about with no makeup and pajamas, I'm showing it on Ms. Acme this time.
My serger did not like this fabric at all, so I used a conventional machine throughout, a narrow zig zag for construction, then a wider zig zag for finishing. The new machine did a great job making all the buttonholes.
Coco recently asked about my dress form. It's an Acme adjustable form that a friend gave to me when she moved to Oregon several years ago. Based on the label (which fell off and is lost), I think it's probably from the 1950's-early 1960's. It has metal bars on inside to allow for adjustment. It a bit smaller than I am, so I use it for display vs. fitting. It comes in handy during construction as a tool for working out how the garment should look.
Thursday, January 1, 2015
Fleece for Wintertime
I just finished a couple of fleece vests over the holidays. They're perfect for the weather here, substituting for a jacket on milder days or as an extra layer when it's colder. Today is one of the colder days (Happy New Year!). I'm still in pjs and probably will be for a while, so I'm going to show them on the dress form.
And some detail shots, since the print obscures them a bit. Collar, yoke, zip and seams:
In-seam pockets:
The pattern is McCall's 5252 View A. Last time I looked, it was still in print. The McCall's site appears to be down right now so I was unable to check.
I cut out both vests at the same time and sewed them right after each other. This is the first one I sewed, using a cat print fleece remnant from JoAnn's.
And some detail shots, since the print obscures them a bit. Collar, yoke, zip and seams:
In-seam pockets:
The pattern is McCall's 5252 View A. Last time I looked, it was still in print. The McCall's site appears to be down right now so I was unable to check.
I was attracted to it by the design details and the MP3 pocket. However, this is a Unisex pattern, which basically means it's designed for a guy. I used a combination of Small through the armscyes, tapering to Medium through the torso, and I had to do a lot of adjustments to make this vest work. I know, I should have known based on the fit on the female model (who looks none too happy about having to wear the sample garment).
First of all, it's very long. I ended up folding out 2" on the front yoke and upper back. I also shortened at the hem another 1 3/4". Second, the shoulders are also very wide. After sewing the vest together and basting the side seams, I tried it on and determined that I needed to narrow each shoulder by 1 1/4". Basically, that just involved taking out the basting, laying out the vest and using the curved ruler to remove a crescent of fabric on each side. Due to the upper body adjustment, I had to move the pockets up. Fortunately I figured that out before inserting the zipper and hemming it. Oh yeah, that MP3 pocket? I left it out. I could not figure out a way to make it work with my iPhone 5 and not look ridiculous. The MP3 pocket is really designed for a smaller device like a Nano. Good thing I have blue tooth ear buds, so it doesn't really matter.
This pattern is also what Kathleen Fasanella calls "coffin clothes," in that all the details are only on the front--no yoke or seaming on the back. It doesn't matter so much with the print fleece, but if it were a solid... I guarantee that similar RTW garments are not designed like that, and I have the clothes to prove it. If I do use this pattern again (and I might), I will modify the back so that it's not just a blank piece of fabric. With all the issues I had with the fit, I do like the style. I think I'd like to try the pullover version of the hoodie at some point.
The next vest is made from sugar skull fleece I saw at Santa Fe Fabrics during last spring's Fiberly Train weekend. Skulls are a popular Southwestern motif due to Dia De Los Muertos.
Detail of the collar and zip:
Butterick 3257 is a copyright 2001 pattern that I've made twice before. It's a favorite, and unlike McCall's 5252, it's designed for women! Much easier to fit right from the envelope with minimal alterations. I used a combination of View C (the red vest) for the body and View D (the cat print vest) for the collar.
This pattern is designed for wovens and faux fur, so the sewing instructions assume the garment is lined. Since I used fleece, I omitted the lining, then simply turned under and top stitched hems in place. I had to improvise the collar but the instructions from McCall's 5252 came in handy when working it out. The collar is a bit high for me, but it's unlikely I'll ever wear this vest zipped all the way to the top.
Neither vest was particularly difficult to make, although the separating zipper can be a little tricky since it's important to match the upper edge, lower edge and any horizontal seams. I always use a longer zipper than called for by the pattern so I don't have to worry about sewing around the pull, then remove excess teeth later. I also try to leave the the entire zipper together when sewing it to the garment. That way it's more likely that the sides will match up.
I noticed that the JoAnn's fleece was thinner and less dense than the fleece from Santa Fe Fabrics, but it's not terrible. I wouldn't consider either to be "technical" quality fleece, but fine for normal wear. You can make a vest out of a small piece of fleece. I had a yard or less of each, and I have remnants left that I can use for mitts, etc.
Neither vest was particularly difficult to make, although the separating zipper can be a little tricky since it's important to match the upper edge, lower edge and any horizontal seams. I always use a longer zipper than called for by the pattern so I don't have to worry about sewing around the pull, then remove excess teeth later. I also try to leave the the entire zipper together when sewing it to the garment. That way it's more likely that the sides will match up.
I noticed that the JoAnn's fleece was thinner and less dense than the fleece from Santa Fe Fabrics, but it's not terrible. I wouldn't consider either to be "technical" quality fleece, but fine for normal wear. You can make a vest out of a small piece of fleece. I had a yard or less of each, and I have remnants left that I can use for mitts, etc.
Sunday, August 24, 2014
A Simple Skirt
This is a simple, one-seamed skirt with an elastic waist that I made from a border print cotton sateen I discovered at JoAnn's last summer. But as you know, simple isn't easy...
I matched the print at the back seam
Difficult to see (success!), but I assure you that there is a seam running up the center back of the skirt. You can tell a little bit at the bottom, because...
...I also added a kick pleat.
My hip measurement and the print dictated the circumference of the skirt, and I used this technique for the matching after pressing under the seam allowance and facing for the kick pleat.
If I had it to do over again, I'd add a lining to minimize wrinkling but I'll just wear a slip with it in the future.
Sunday, August 3, 2014
T Shirts--A TNT and a New One.
What happened to July? Seems like I totally missed it--lots going on at work, and I kind of lost my sewing mojo with all that was happening. I actually was doing some sewing though, thanks to my trusty Material Girls group. I nearly always manage to cut out a project or two when I'm there. It just took me a little while to finish them since I like to combine my cover stitching projects.
The first one I made was Kwik Sew 2565, which I must have made about a hundred times by now.
But why not? It's a great pattern that I've already tweaked to my liking.The fabric is a really nice rayon(?) knit from Casual Elegance. It has a good drape, and is thicker than most rayon knits. But before I got sold on all that, I just loved the watercolor animal print. Just beautiful, and can be worn with just about anything.
Umm, yes, the print is a little off center, but oh well. I still like it, and as Ann says, "This is a summer tee, so the slightly off-center placement of the major motif on the front is just fine."
The other one is the Eureka Top from TSW.
I have mixed feelings about it, because dang! The sizing is huge. I cut out my usual Small/Medium mix for this shirt and it's enormous. I am going to try again in a straight Small to see if I like it better. At least it will be comfortable to wear in the heat.
For this, I used another rayon knit that I found at Joann's a couple of years ago. On first glance, it looks like a floral but it's really a skull print.
It's thinner than the Casual Elegance fabric and a more cotton-y look and feel.
Here it is styled like all the shirts you've been seeing lately in fashion shots.
What's with that anyway? Here it is loose. See? It's big.
I have another project underway that I hope to have finished soon, a border print skirt. And there's also that repeat of the Eureka pattern.
The first one I made was Kwik Sew 2565, which I must have made about a hundred times by now.
But why not? It's a great pattern that I've already tweaked to my liking.The fabric is a really nice rayon(?) knit from Casual Elegance. It has a good drape, and is thicker than most rayon knits. But before I got sold on all that, I just loved the watercolor animal print. Just beautiful, and can be worn with just about anything.
Umm, yes, the print is a little off center, but oh well. I still like it, and as Ann says, "This is a summer tee, so the slightly off-center placement of the major motif on the front is just fine."
The other one is the Eureka Top from TSW.
I have mixed feelings about it, because dang! The sizing is huge. I cut out my usual Small/Medium mix for this shirt and it's enormous. I am going to try again in a straight Small to see if I like it better. At least it will be comfortable to wear in the heat.
For this, I used another rayon knit that I found at Joann's a couple of years ago. On first glance, it looks like a floral but it's really a skull print.
It's thinner than the Casual Elegance fabric and a more cotton-y look and feel.
Here it is styled like all the shirts you've been seeing lately in fashion shots.
What's with that anyway? Here it is loose. See? It's big.
I have another project underway that I hope to have finished soon, a border print skirt. And there's also that repeat of the Eureka pattern.
Subscribe to:
Posts (Atom)